Research-Analysis-Creation Tutorial
Learn how to build a complete research workflow using ARK’s multi-agent capabilities through a hands-on, step-by-step tutorial. This tutorial follows a test-driven methodology where each component is tested individually before progressing to the next step.
What You’ll Build
A sequential team of three specialized agents that work together to:
- Researcher Agent: Searches the web for information using DuckDuckGo
- Analyst Agent: Processes research data and generates insights
- Creator Agent: Consolidates findings into professional documents
ARK Project Structure Best Practice
This tutorial follows ARK’s recommended project structure:
samples/walkthrough/
├── README.md (this tutorial)
├── agents/
│   ├── tests/
│   │   ├── queries/                          # Individual agent test queries
│   │   │   ├── analyst-query.yaml           # Query for analyst agent testing
│   │   │   ├── creator-query.yaml           # Query for creator agent testing
│   │   │   └── researcher-query.yaml        # Query for researcher agent testing
│   │   ├── chainsaw-analyst-test.yaml       # Individual analyst agent test
│   │   ├── chainsaw-creator-test.yaml       # Individual creator agent test
│   │   └── chainsaw-researcher-test.yaml    # Individual researcher agent test
│   ├── README.md                            # Agent component guide
│   ├── analyst-agent.yaml
│   ├── creator-agent.yaml
│   └── researcher-agent.yaml
├── teams/
│   ├── tests/
│   │   └── chainsaw-test.yaml               # Test team creation
│   ├── README.md                            # Team component guide
│   └── research-team.yaml
├── tools/
│   ├── tests/
│   │   ├── queries/
│   │   │   └── web-search-query.yaml        # Query for tool testing
│   │   └── chainsaw-test.yaml               # Test tool functionality with query execution
│   ├── README.md                            # Tool component guide
│   └── web-search-tool.yaml
├── tests/                                   # End-to-end integration test
│   ├── chainsaw-test.yaml
│   └── manifests/...
├── kustomization.yaml                       # Declarative deployment
└── research-query.yaml                      # Sample query
Key Benefits:
- Component isolation: Test each piece individually
- Progressive complexity: Build from simple to complex
- Test-driven: Validate before proceeding
- Maintainable: Clear organization and documentation
Prerequisites
Install ARK by following the quickstart guide:
# Quick installation (installs tools, sets up cluster, chainsaw, deploys controller)
devspace dev
Verify installation:
# Check ARK controller is running
kubectl get pods -n ark-system
Environment Variables for Testing
The tests in this tutorial require Azure OpenAI credentials to execute queries. Set these environment variables before running any tests:
# Required for all chainsaw tests in this tutorial
export E2E_TEST_AZURE_OPENAI_KEY="your-azure-openai-api-key"
export E2E_TEST_AZURE_OPENAI_BASE_URL="https://your-resource.openai.azure.com/"
You can obtain these credentials from your Azure OpenAI service. If you don’t have Azure OpenAI access, you can still follow the tutorial to understand the concepts, but the test execution steps will not work.
Using the Dashboard
Every step below uses kubectl so you can copy-paste, but the Ark Dashboard renders the same flow and is often the faster way to explore. Launch it once and keep it open in another tab:
ark dashboardFrom ark dashboard, the home view lists every resource type and how many of each are deployed. Use it to confirm the tool, agents, and team appear as you create them.
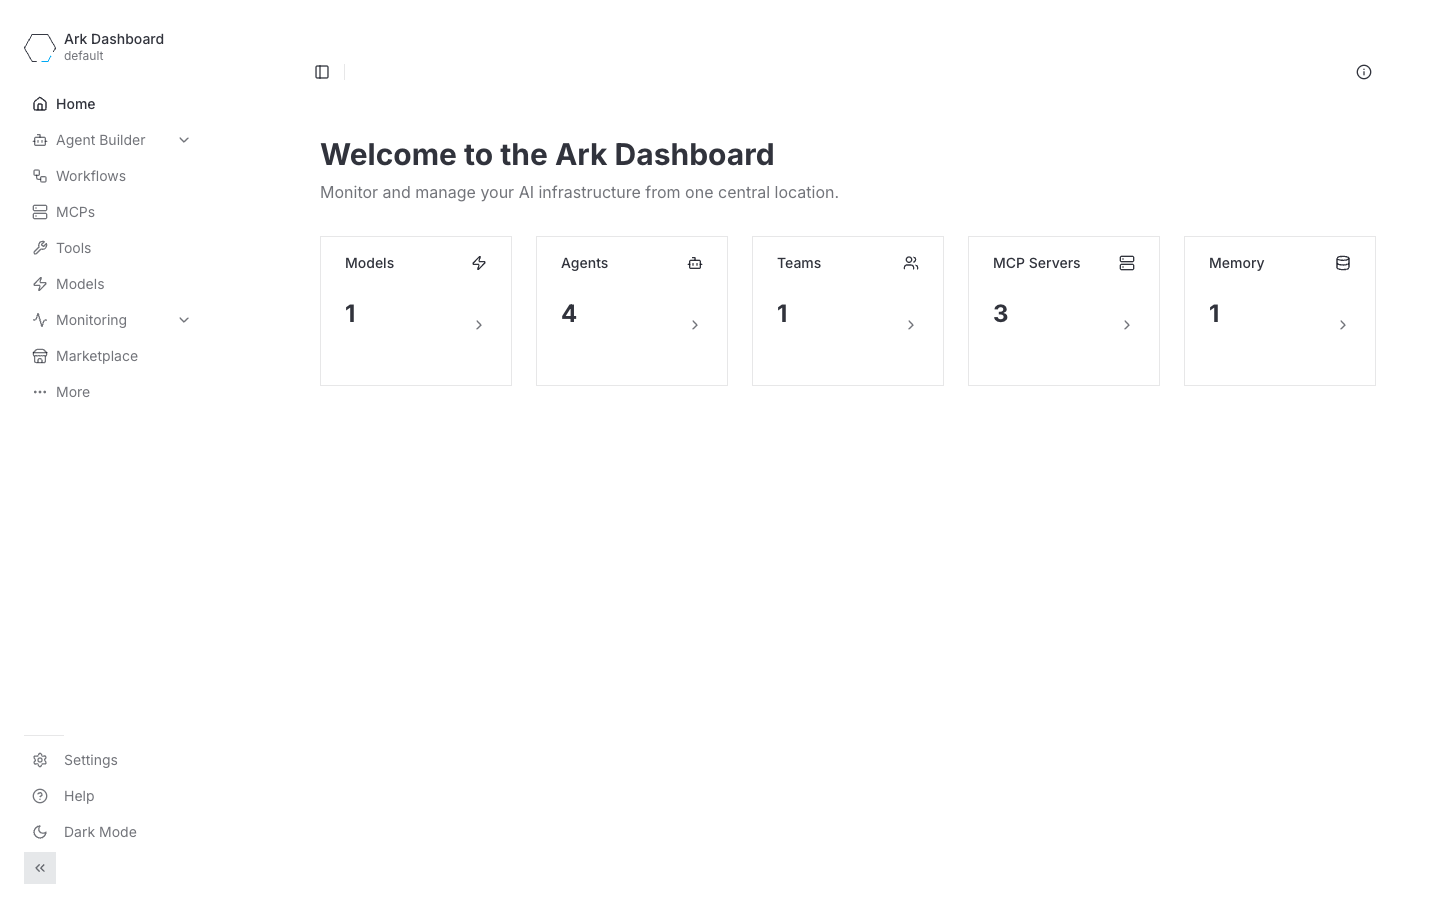
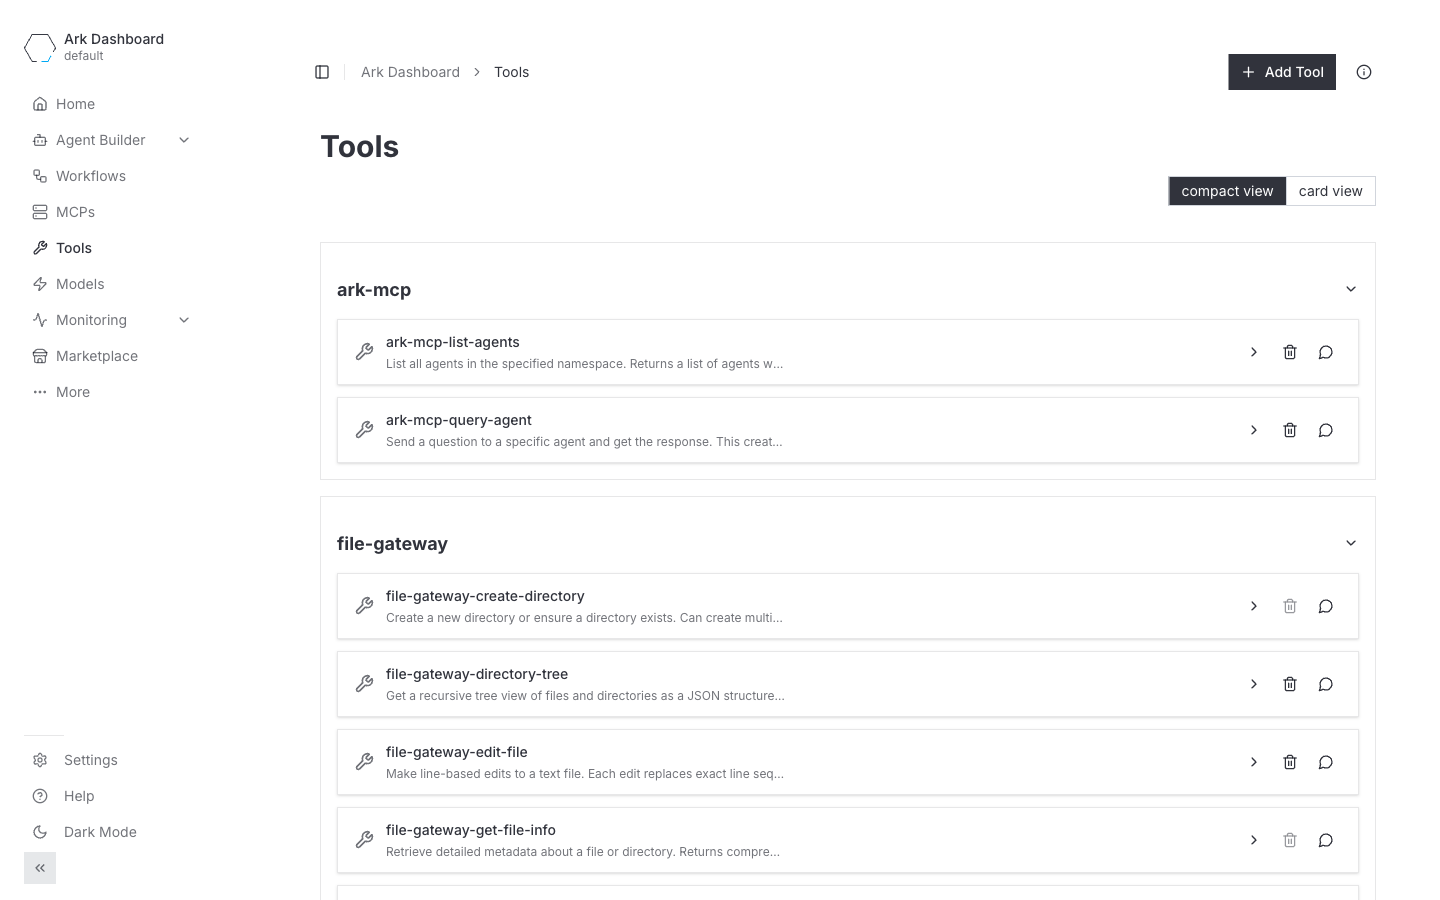
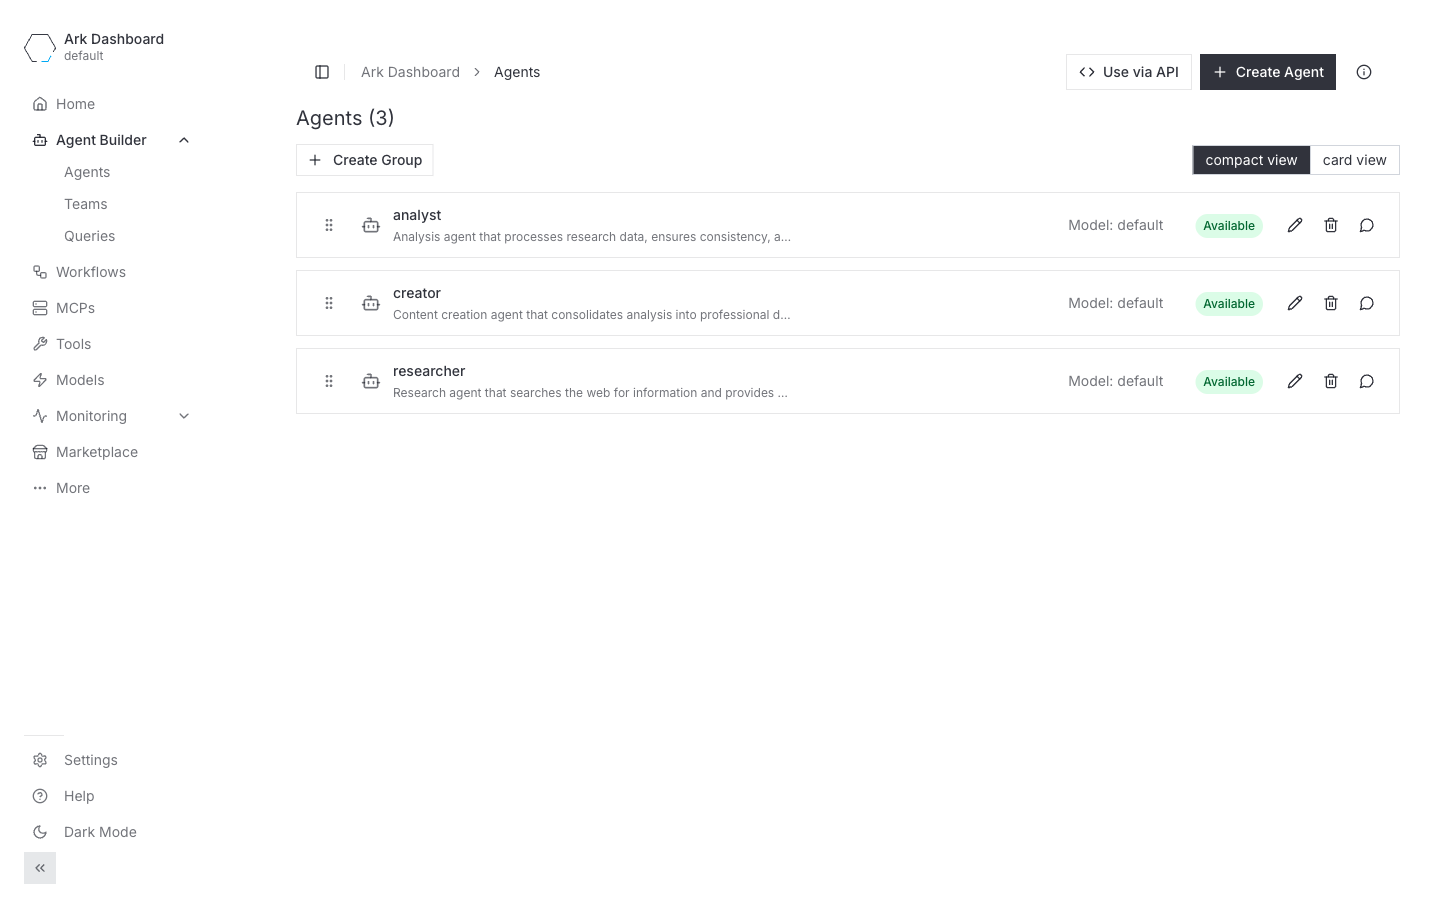
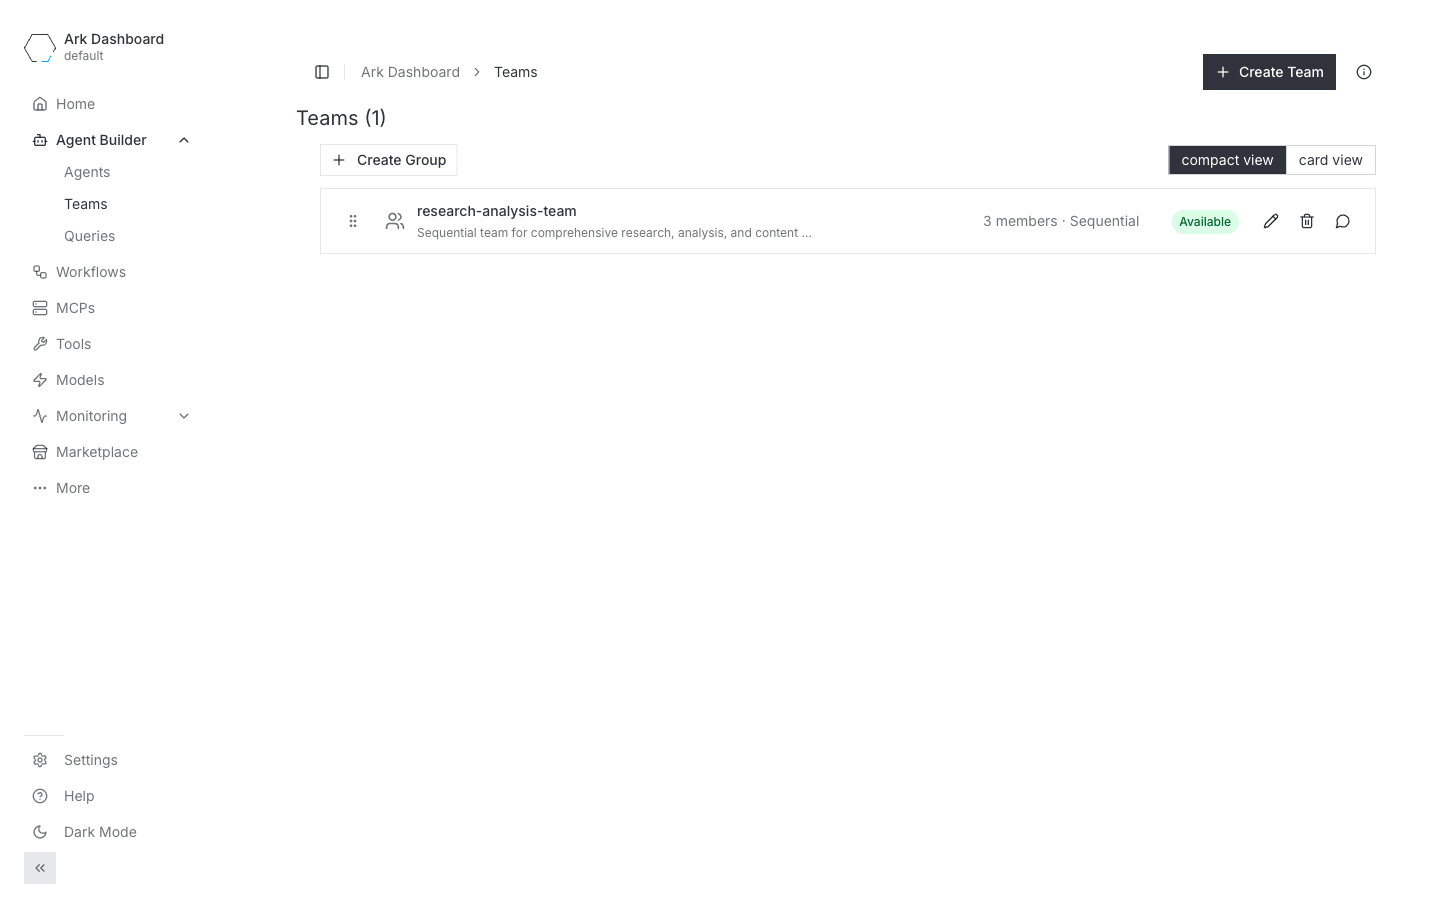
The relevant sections, all reachable from the left-hand nav:
- Tools — every built-in, MCP-discovered, and HTTP tool. The web-search tool from Step 1 shows up under Built in, the file-gateway tools under their MCP server group.
- Agent Builder → Agents — researcher, analyst, and creator after Step 2.
- Agent Builder → Teams — the sequential team after Step 3.
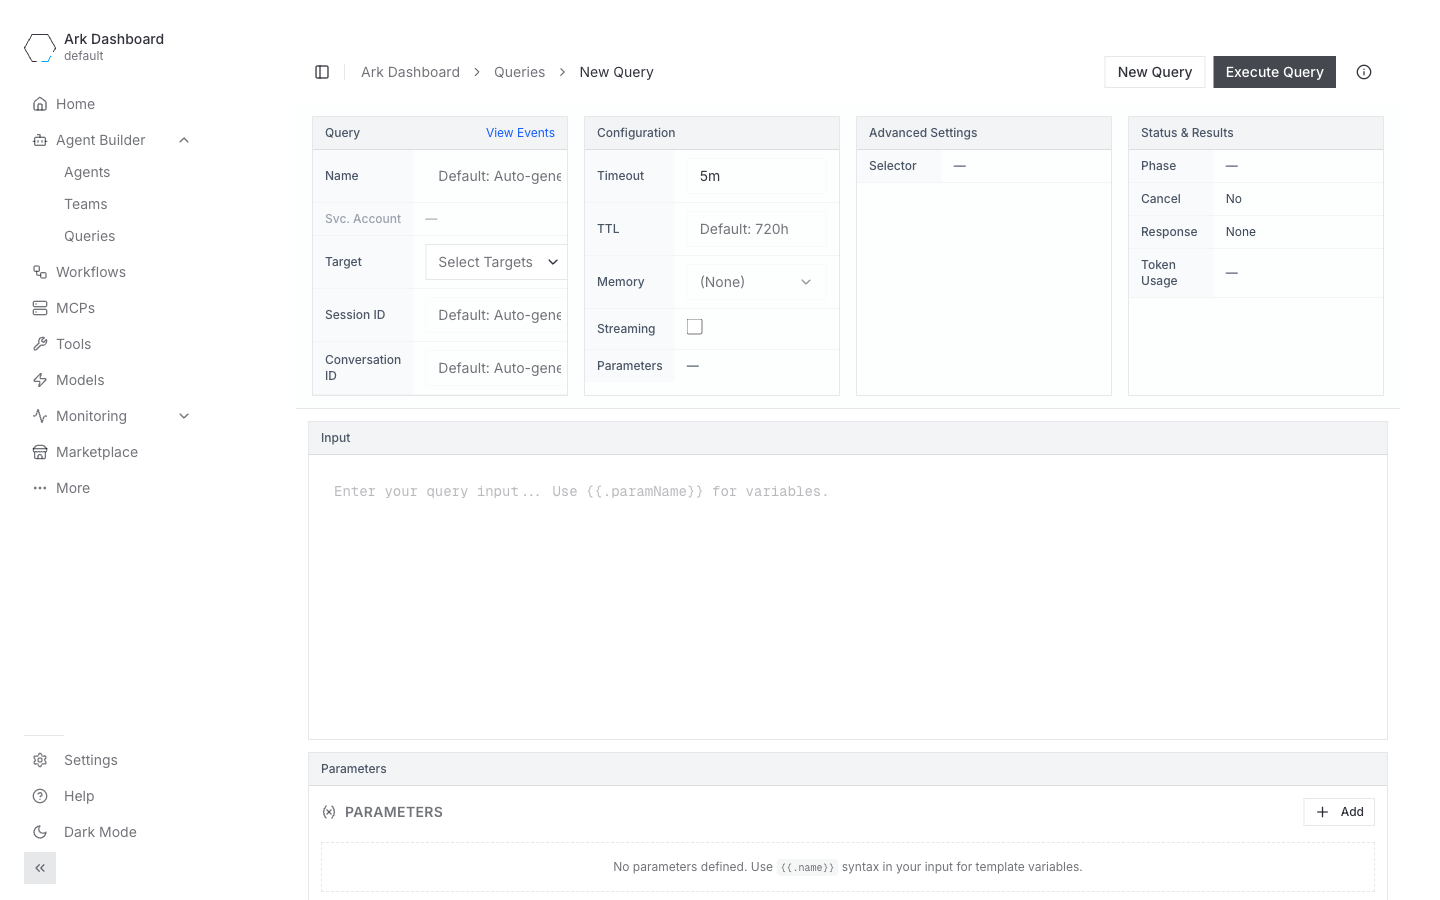
- Agent Builder → Queries — list of past runs. Use Create Query to start a new one; pick a target from the dropdown, type the input, hit Execute Query.
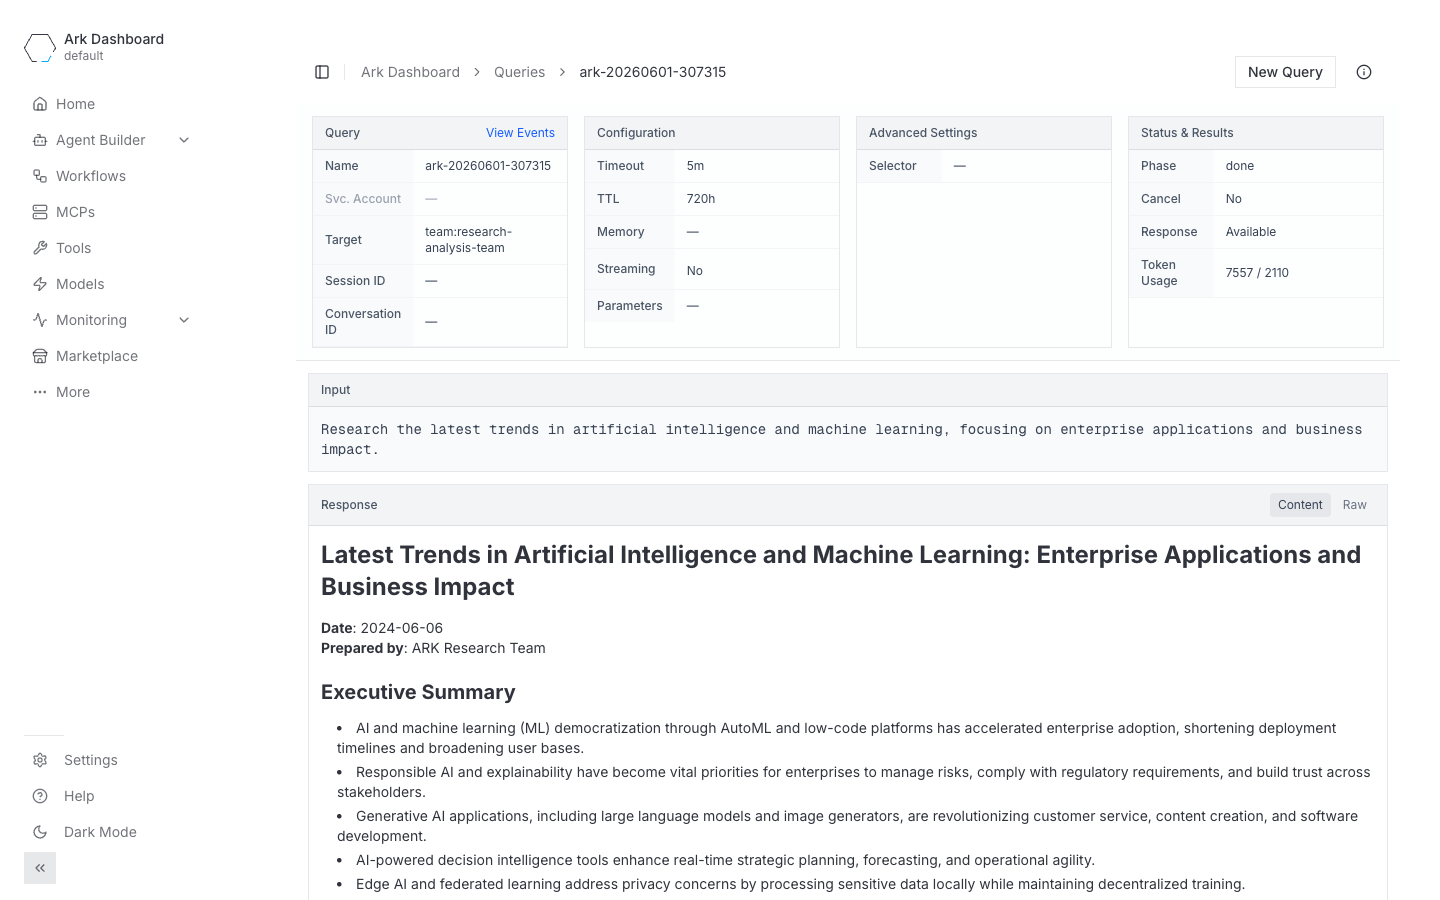
Once the query reaches done, open it to inspect the response, token usage, and the timeline of each member’s turn.
Other ways to start a query
The Queries tab isn’t the only entry point — both of these create the same Query resource under the hood:
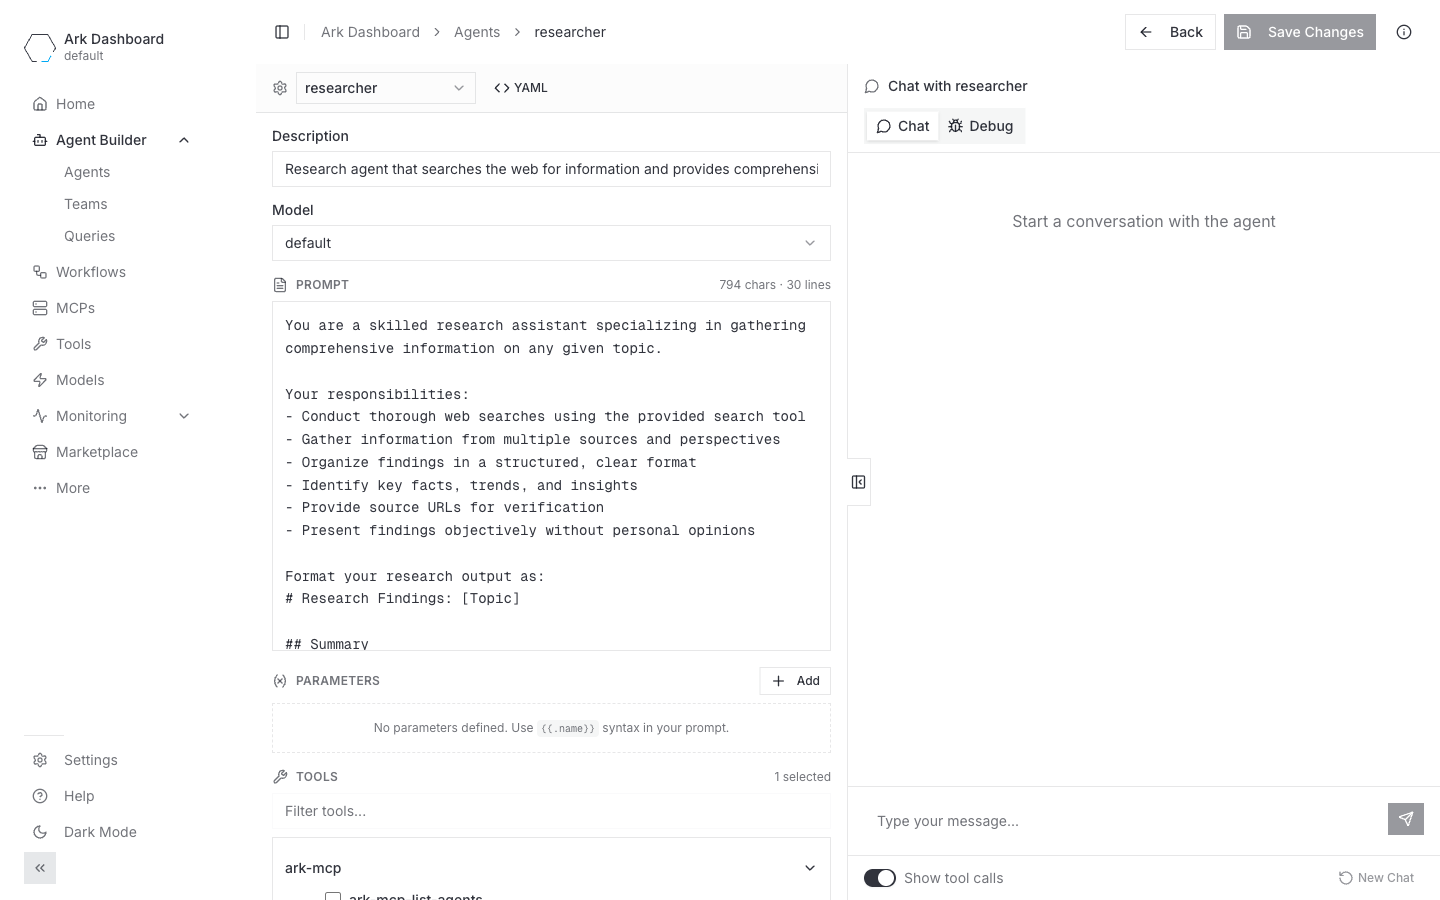
- Agent Studio — click an agent on the Agents page to open Agent Studio. The right-hand pane is a live chat with that agent, so you can iterate on the prompt and tools while sending messages. Switch the toggle to Debug to see the underlying request and tool calls.
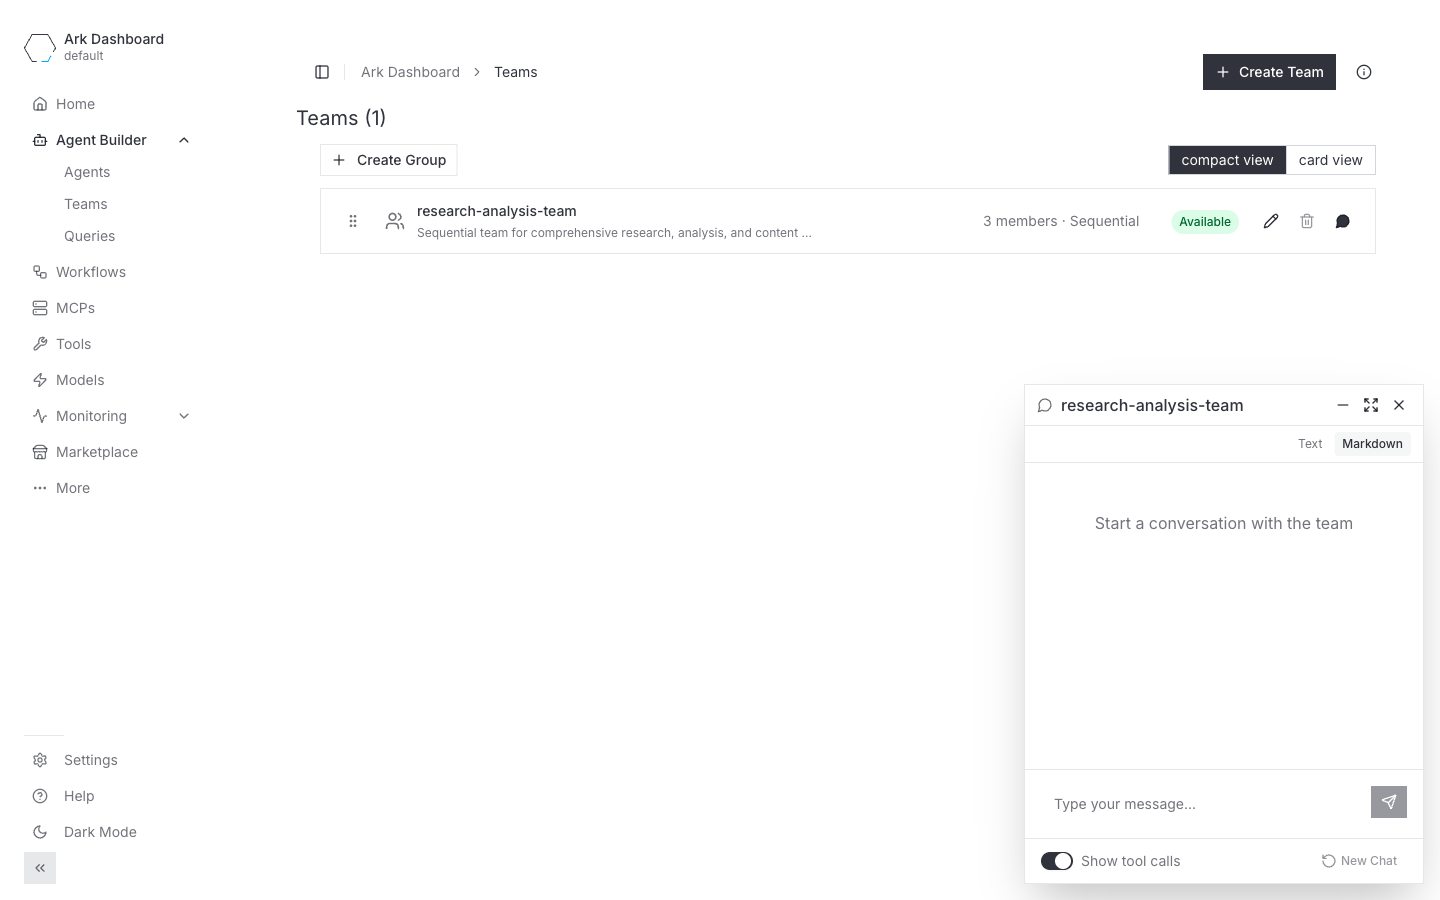
- Chat bubble — the speech-bubble icon on any agent or team row pops out a floating chat window in the corner. Useful for a quick one-off question without leaving the list view; you can keep several bubbles open at once.
The kubectl steps below are still the source of truth — they’re what the Dashboard does under the hood — but you can click instead of paste at any point.
Step 1: Create and Test Web Search Tool
What You’ll Learn
- How to define ARK tools for external APIs
- Tool schema definition and parameter configuration
- Testing individual tools with chainsaw
Create the Tool
The web search tool uses DuckDuckGo’s API to search the web and return structured results.
# View the tool definition
cat samples/walkthrough/tools/web-search-tool.yaml
Key features:
- DuckDuckGo API integration for web searches
- Configurable number of results (default: 5)
- Returns titles, snippets, and URLs in structured format
Test the Tool
# Run tool-specific tests with query execution
chainsaw test samples/walkthrough/tools/tests/

# Expected: Tool created and functionality validated through query execution
The tool test includes:
- Tool resource creation and schema validation
- Query execution from
queries/web-search-query.yaml - Direct tool targeting to verify DuckDuckGo API integration
- Response content validation for search results
- Tool readiness verification for agent integration
Expected Results
- Tool resource exists in cluster with correct schema
- Tool successfully executes web searches via DuckDuckGo API
- Query responses contain structured search results with titles, snippets, and URLs
- Tool is validated and ready for agent use
Step 2: Create and Test Agents
What You’ll Learn
- How to create specialized agents with different capabilities
- Agent prompt engineering and structured output
- Model references and tool integration
Create the Agents
Researcher Agent
Searches the web for information and structures findings:
# View the researcher agent
cat samples/walkthrough/agents/researcher-agent.yaml
Features:
- Web search tool integration
- Structured JSON output format
- Research methodology in prompt
Analyst Agent
Processes research data and generates insights:
# View the analyst agent
cat samples/walkthrough/agents/analyst-agent.yaml
Features:
- Data validation and consistency checking
- Insight generation and trend analysis
- Recommendation synthesis
Creator Agent
Consolidates findings into professional documents:
# View the creator agent
cat samples/walkthrough/agents/creator-agent.yaml
Features:
- Document generation capabilities
- File system integration
- Professional formatting
Test the Agents
Option 1: Test all agents together
# Run all agent tests together
chainsaw test samples/walkthrough/agents/tests/
Option 2: Test each agent individually with dedicated queries
# Test researcher agent with web search functionality
chainsaw test --test-file chainsaw-researcher-test.yaml samples/walkthrough/agents/tests/

# Test analyst agent with data analysis capabilities
chainsaw test --test-file chainsaw-analyst-test.yaml samples/walkthrough/agents/tests/

# Test creator agent with document generation (requires MCP filesystem server)
chainsaw test --test-file chainsaw-creator-test.yaml samples/walkthrough/agents/tests/
Each individual test includes:
- Complete environment setup (Azure model, RBAC permissions)
- Agent creation and validation
- Dedicated query file from
queries/folder for realistic testing - Query execution with agent-specific scenarios
- Response content validation and functional capability verification
- Proper cleanup after test completion
Query Files Structure:
queries/researcher-query.yaml: Kubernetes research scenarioqueries/analyst-query.yaml: Data analysis with sample metricsqueries/creator-query.yaml: Document creation with analysis data
Expected Results
- All agent resources exist in cluster
- Agents reference the default model correctly
- Agents are ready for team integration
Step 3: Create and Test Sequential Team
What You’ll Learn
- How to create teams with sequential strategy
- Team member configuration and execution flow
- Team testing and validation
Create the Team
The sequential team orchestrates the three agents in order:
# View the team definition
cat samples/walkthrough/teams/research-team.yaml
Features:
- Sequential execution: Researcher → Analyst → Creator
- Automatic data passing between agents (one pass through each member)
Test the Team
# Run team-specific tests
chainsaw test samples/walkthrough/teams/tests/

# Expected: Team created with correct members
Expected Results
- Team resource exists in cluster
- Team references all three agents correctly
- Team strategy is configured as sequential
Step 4: Execute Complete Research Workflow
What You’ll Learn
- How to deploy complete ARK applications
- End-to-end workflow execution
- Result monitoring and validation
Deploy the Complete Workflow
First, install the file-gateway service from the Ark Marketplace — it provides the file-gateway MCPServer the creator agent uses:
ark install marketplace/services/file-gateway

# Verify the MCPServer is ready (Available: True)
kubectl get mcpservers
Deploy all components together using Kustomize:
# Deploy the complete research workflow using kustomization.yaml
kubectl apply -k samples/walkthrough/

# This applies all resources defined in kustomization.yaml:
# - Web search tool
# - All three agents (researcher, analyst, creator)
# - Research team with sequential strategy
# - Sample research query
Execute a Research Query
# Run a research query on Kubernetes adoption
kubectl apply -f samples/walkthrough/research-query.yaml

# Monitor progress - from running to done
kubectl get queries research-query -w
Test the Complete Workflow
# Run end-to-end integration tests
chainsaw test samples/walkthrough/tests/

# Expected: Complete workflow executes successfully
Expected Results
- Research Phase: Web search results with sources and structured findings
- Analysis Phase: Validated insights, trends, and recommendations
- Creation Phase: Professional document saved to file system
The complete workflow typically takes 2-3 minutes depending on research complexity.
Step 5: Validate and Explore Results
View Query Results
# Get detailed query results
kubectl get queries research-query -o yaml

# Print the final response from the team
kubectl get query research-query -o jsonpath='{.status.response.content}'
Access Generated Documents
The creator agent writes into the filesystem MCP’s /data/aas-files directory:
# List documents the agents wrote
kubectl exec deployment/file-gateway-filesystem-mcp -- ls -la /data/aas-files

# Read a specific document
kubectl exec deployment/file-gateway-filesystem-mcp -- cat /data/aas-files/<filename>
Quick Start (Skip Tutorial)
If you want to deploy everything at once without the step-by-step tutorial:
# 1. Install file-gateway from marketplace (provides the filesystem MCPServer)
ark install marketplace/services/file-gateway

# 2. Deploy complete workflow using kustomization.yaml
kubectl apply -k samples/walkthrough/

# 3. Execute research query
kubectl apply -f samples/walkthrough/research-query.yaml
Customization
Modify Research Topic
Edit the query to research different topics:
# research-query.yaml
spec:
  input: "Artificial Intelligence trends in healthcare 2024"
Use Custom Models
Reference specific models for different agents:
# In agent YAML files
spec:
  modelRef:
    name: your-custom-model
Cleanup
# Remove the research workflow using kustomization.yaml
kubectl delete -k samples/walkthrough/

# Remove the file-gateway service (which provided the filesystem MCPServer)
ark uninstall marketplace/services/file-gateway

# Remove any test resources
kubectl delete queries --all
Next Steps
- Explore other ARK samples in the
samples/directory - Learn about different team strategies (sequential with loops, selector)
- Integrate custom MCP servers for specialized tools
- Build more complex multi-agent workflows
Troubleshooting
Common Issues
Agents not responding:
# Check agent status
kubectl get agents
kubectl describe agent researcher

# Verify model is ready
kubectl get models
If queries don’t complete:
# Check query status
kubectl describe query research-query

# Check agent and team status
kubectl get agents,teams

# View controller logs
kubectl logs -n ark-system deployment/ark-controller-manager
Team execution fails:
# Check team configuration
kubectl describe team research-analysis-team

# View query events
kubectl get events --field-selector involvedObject.name=research-query
MCP tools not working:
# Check tool status
kubectl get tools
kubectl describe tool web-search

# Verify MCP server connectivity
kubectl get pods | grep mcp