Building A2A Servers
This guide shows you how to create A2A servers that host custom agents. Exposing agents via A2A servers allows you to develop agents using your preferred tools and frameworks, such as LangChain, CrewAI, or custom agent code and expose them to Ark using the A2A protocol.
If you want deeper Ark integration (automatic agent config resolution, tool definitions, conversation history), see Building Execution Engines which uses the Ark Python SDK.
Quickstart
The fastest way to get started is with the Simple Agent sample . This sample has the following basic structure:
simple-agent/
├── src/
│   └── simple_a2a_server/    # Python package with A2A server implementation
│       ├── __init__.py
│       ├── __main__.py
│       └── main.py           # Main server with agent logic and A2A handlers
├── Dockerfile                 # Container image for deployment
├── devspace.yaml              # DevSpace config for k8s deployment with hot reload
├── manifests.yaml             # K8s resources (Deployment, Service, A2AServer)
├── Makefile                   # Build and run commands
├── pyproject.toml             # Python dependencies (a2a-sdk, uvicorn, starlette)
└── README.md                  # Usage instructions
This A2A server demonstrates:
- ✅ How to run an A2A server
- ✅ How to expose an agent via an “Agent Card”
- ✅ How to respond to queries
- ✅ Local in-cluster development with devspace
- ✅ Required Kubernetes resources to deploy to a cluster
The sample’s response logic is a deliberately simple, dependency-free keyword matcher — it is not an LLM agent. The point is the A2A plumbing, not the intelligence. In src/simple_a2a_server/main.py, SimpleAgentExecutor._process_message is the seam where a real implementation would call your LLM client or agent framework (LangChain, CrewAI, custom code); everything around it — the agent card, the A2A server, and Ark discovery — stays the same.
Running Locally and Testing with the A2A Inspector
You can run your A2A server locally and test with the A2A Inspector . Run the server locally first:
# Go to the simple agent sample and run locally.
cd samples/a2a/simple-agent
make dev
The A2A server is now running on: http://0.0.0.0:8000
Now install and run the A2A inspector:
git clone https://github.com/a2aproject/a2a-inspector.git
cd a2a-inspector
chmod +x scripts/run.sh
bash scripts/run.sh
Open the A2A Inspector at http://127.0.0.1:5001. Enter the URL of your A2A server, which for the sample is: http://localhost:8000
You can also send requests directly to the A2A server for lower-level testing. Some basic curl commands are below:
# Show the Agent Card.
curl http://localhost:8000/.well-known/agent.json | jq .

# Test health endpoint
curl http://localhost:8000/health

# Send a message
curl -X POST http://localhost:8000/ \
  -H "Content-Type: application/json" \
  -d '{
    "jsonrpc": "2.0",
    "method": "message/send",
    "params": {
      "message": {
        "messageId": "test-1",
        "contextId": "ctx-1",
        "role": "user",
        "parts": [{"kind": "text", "text": "Hello world"}]
      }
    },
    "id": 1
  }' | jq .
Integrating with Ark
Ark can discover the agent running in an A2A server and create an agent resource from it. This allows you to query the agent, put it into teams, expose it via APIs and so on.
Rather than running the sample agent locally, you can run it in the cluster with devspace, which runs your code in a container with live reload so edits are reflected without a rebuild:
# Start the a2a server with live reload.
cd samples/a2a/simple-agent
devspace dev
Running with devspace applies the resources in the manifests.yaml file. These are:
Deployment - simple-agent    # This tells kubernetes to deploy your sample agent server
Service - simple-agent       # This tells k8s that your server is exposed on port 8080
A2AServer - simple-agent     # This tells Ark it should load your a2a server from the service
You can see each of these resources like so:
kubectl get deployments
# NAME                    READY   UP-TO-DATE   AVAILABLE   AGE
# simple-agent-devspace   1/1     1            1           5m32s

kubectl get services
# NAME           TYPE        CLUSTER-IP      EXTERNAL-IP   PORT(S)    AGE
# simple-agent   ClusterIP   10.96.204.83    <none>        80/TCP     5m53s

kubectl get a2aservers
# NAME           READY   DISCOVERING   ADDRESS                                             AGE
# simple-agent   True    False         http://simple-agent.default.svc.cluster.local:80   6m13s
Note that to enable live reload, devspace creates a special ‘dev’ deployment. Details are in the devspace docs.
Ark will monitor the A2AServer resource that has been created, and will attempt to load the agent card. If the agent card is loaded successfully, it will create a new Agent - when this agent is queried, the query will be passed to your A2A server. Check these resources like so:
# Check the A2AServer status.
kubectl get a2aserver simple-agent -o yaml
# NAME           READY   DISCOVERING   ADDRESS                                             AGE
# simple-agent   True    False         http://simple-agent.default.svc.cluster.local:80   6m13s

# Check if Ark created an Agent from the A2A server.
kubectl get agents
# NAME           MODEL   AVAILABLE   AGE
# simple-agent           True        2m20s

# Query the agent you created.
ark agent query simple-agent "who are you?"
# I received your message: 'who are you?'. I'm a simple agent, so I can help with basic tasks like greetings, simple math, or just echoing your messages back to you. Try asking for help to see what I can do!
The agent has no modelRef (A2A agents bring their own model) and uses the built-in a2a execution engine. It becomes AVAILABLE True once its A2AServer is Ready.
Viewing in the dashboard
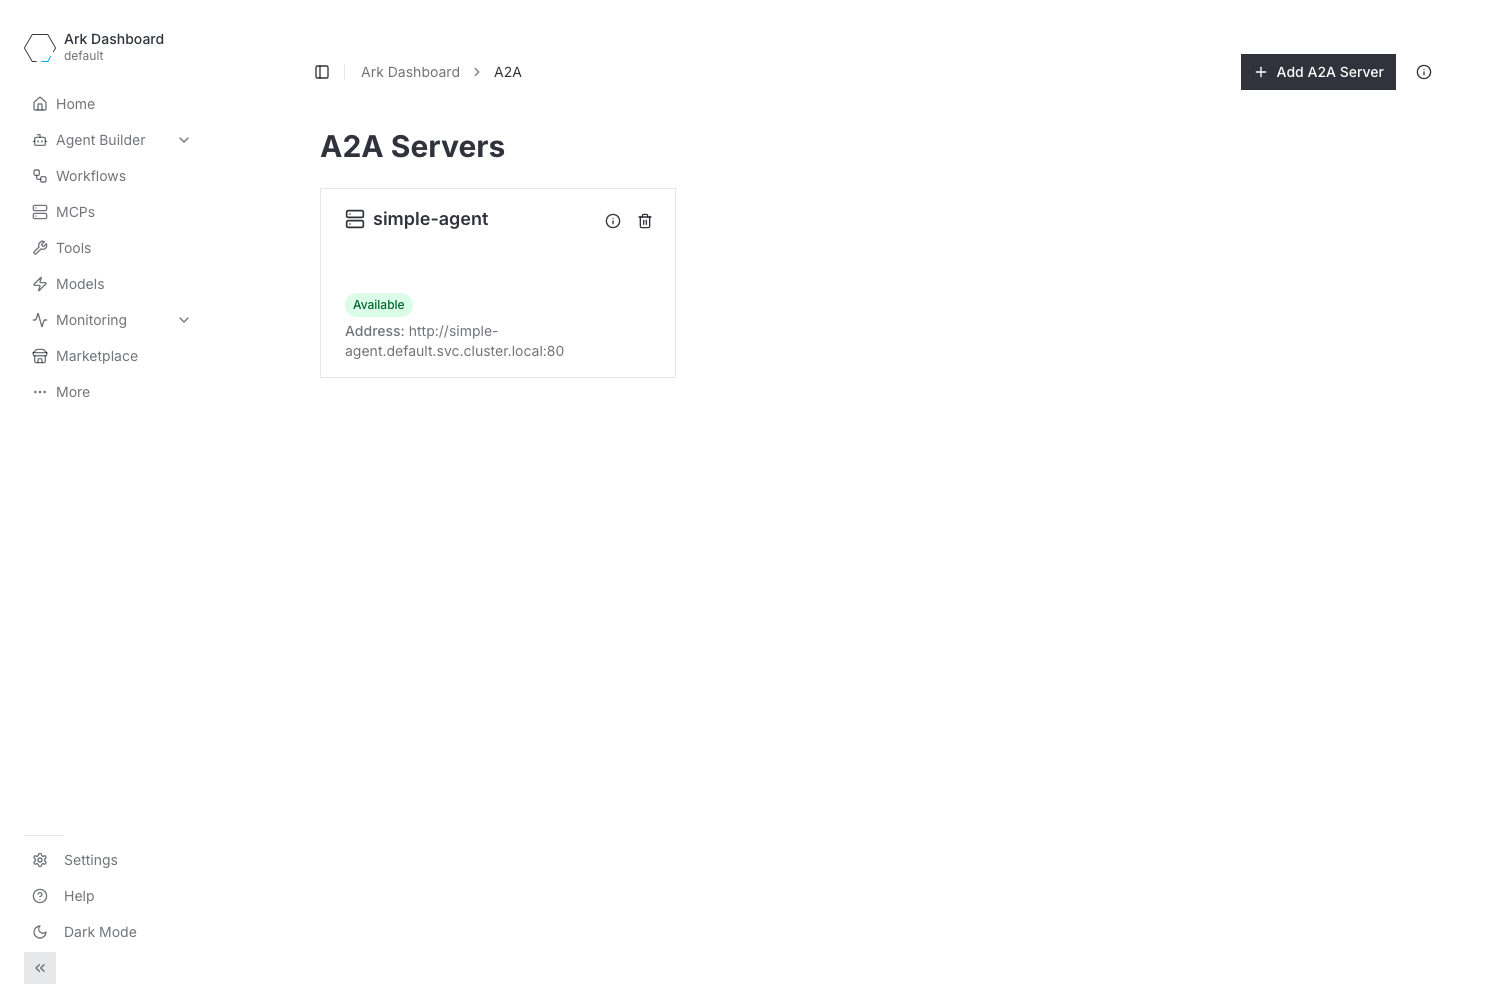
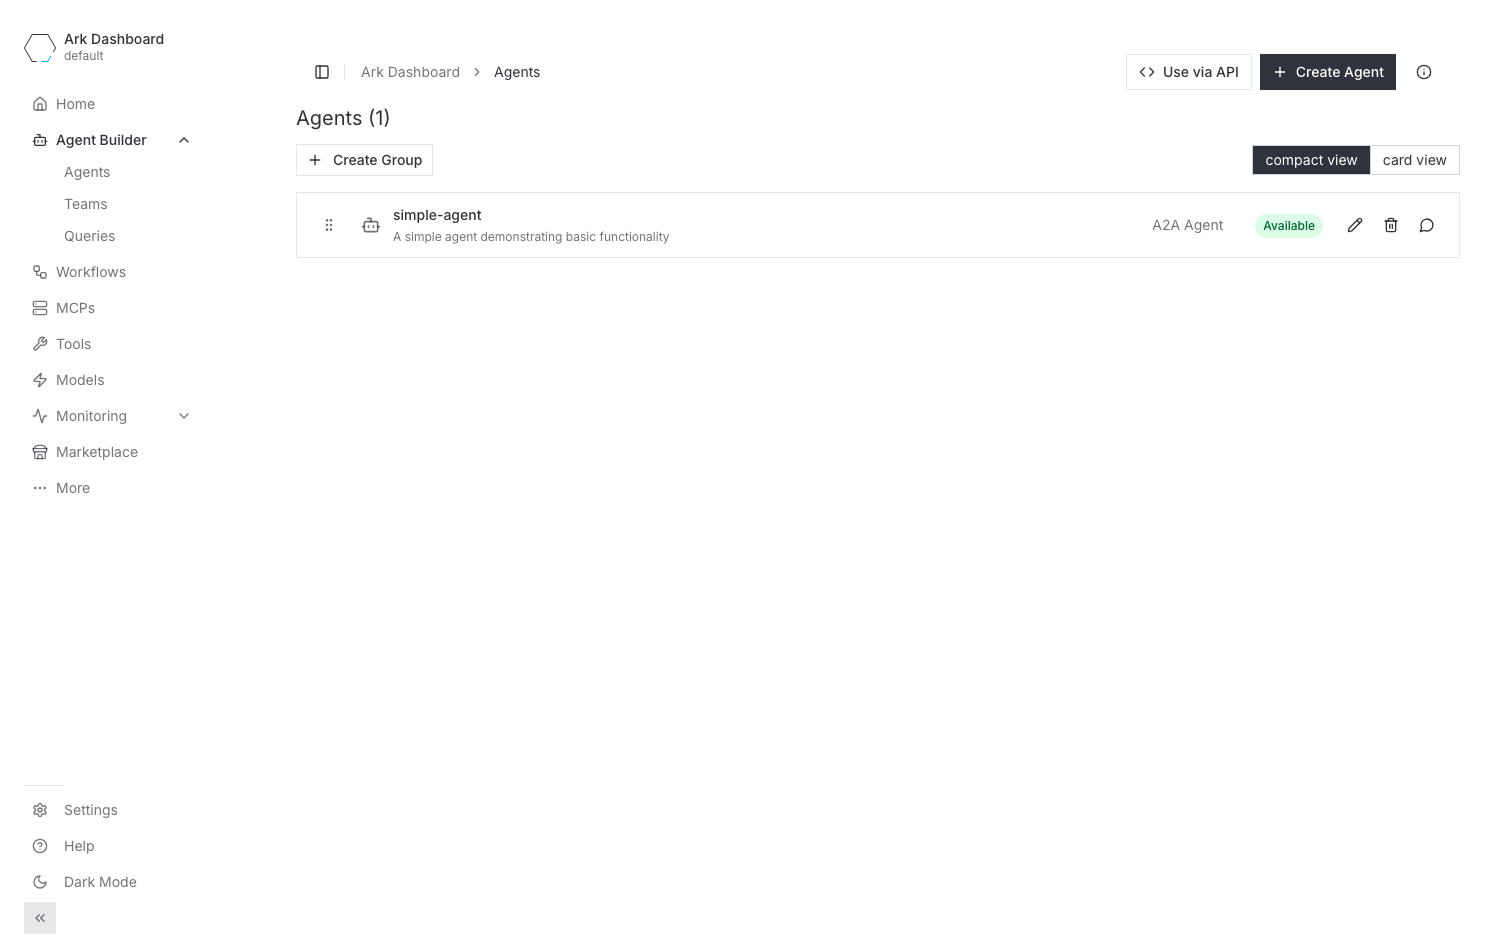
The dashboard surfaces both the A2A server and the agent Ark created from it. Open it with ark dashboard.
The A2A Servers page lists the registered server with its status and resolved address:
Under Agent Builder → Agents, the discovered agent appears tagged as an A2A Agent:
You can uninstall / cleanup your deployment with:
devspace purgeReturning Responses
Your A2A server can reply with either a stateless Message or a stateful Task. Ark extracts the response text from both:
Message: Ark reads the text parts of the message.Task: Ark reads the final answer from, in order of precedence:- Text
artifacts(artifacts[].parts[].text, orTaskArtifactUpdateEventwhen streaming) - The terminal
status.message(or a finalTaskStatusUpdateEventwhen streaming) - Agent messages in
history
- Text
A completed Task that returns its output as a text artifact is the canonical A2A pattern (the spec states completed tasks should use artifacts to return generated output), so Ark checks artifacts first. The terminal status.message and history are used as fallbacks, so agents that report results either way work unchanged.
Only text is extracted as the response. File and data parts are recorded on the A2ATask resource status for observability but are not returned as the query answer.
Timeout Configuration
ARK provides flexible timeout configuration for A2A agent execution through multiple layers:
Timeout Behavior
A2A execution automatically respects query timeouts:
- Query.spec.timeout (default: 30 minutes) sets the overall time limit
- A2AServer.spec.timeout (optional) can reduce the timeout for specific A2A servers
The A2A execution uses Go’s context deadline, so remaining time is automatically tracked as the query progresses. Any spec.timeout takes effect — the context deadline is authoritative, including values above the 30 minute default. The HTTP client applies a 30 minute backstop only to callers that set no deadline of their own; a query always carries its own budget, so the backstop never caps it.
Configuring A2AServer Timeout
apiVersion: ark.mckinsey.com/v1prealpha1
kind: A2AServer
metadata:
  name: my-a2a-server
spec:
  address:
    value: "http://my-a2a-server:8000"
  timeout: "2m"  # Limit this server's calls to 2 minutes
Example Usage
apiVersion: ark.mckinsey.com/v1prealpha1
kind: A2AServer
metadata:
  name: my-agent
spec:
  address:
    value: "http://my-agent.default.svc.cluster.local:80"
  description: "My A2A agent"
  timeout: "10m"  # 10 minutes timeout
Configuring Query Timeout
Override the timeout for specific queries:
apiVersion: ark.mckinsey.com/v1alpha1
kind: Query
metadata:
  name: long-running-query
spec:
  input: "Complex analysis task"
  target:
    type: agent
    name: my-agent
  timeout: "30m"  # 30 minutes for this specific query
Best Practices
- Set Query timeout appropriately: Configure query timeout based on expected total execution time
- Monitor context deadlines: HTTP clients automatically respect context deadlines with buffer
- Use A2AServer timeout for documentation: Set A2AServer timeout to document expected response times
- Monitor and adjust: Use ARK telemetry to identify queries that timeout and adjust accordingly